Putting Studio Monitors in their Place
Too close, too wide or shoved against a wall, your monitors are quick to misbehave. Set boundaries to clean up your mixes.
Ian Gardner is a British-American broadcaster, voice artist and audio enthusiast, sharing years of experience building creative workflows from a modern home studio. He helps readers make smarter buying decisions across studio gear, production tools and home comforts for both inside and outside the workspace. Broadcasters, podcasters, voice artists, producers and digital creators will find guidance that supports high production values and efficient workflows for building a successful home studio business. Similar articles can be found in the studio-essentials blog.
Your studio monitors might be brilliant, but if they are in the wrong place they are basically lying to you. A few smart moves can turn muddy guesswork into clean, confident audio decisions.
Studio monitor placement is one of those topics that sounds boring until you realise it is the difference between mixes that travel well and mixes that only sound good at your desk. You can own great monitors and still fight strange bass, harsh highs, and reverb that was not in your recording. The good news is that fixing this costs far less than buying new gear and often just requires moving things a few inches.
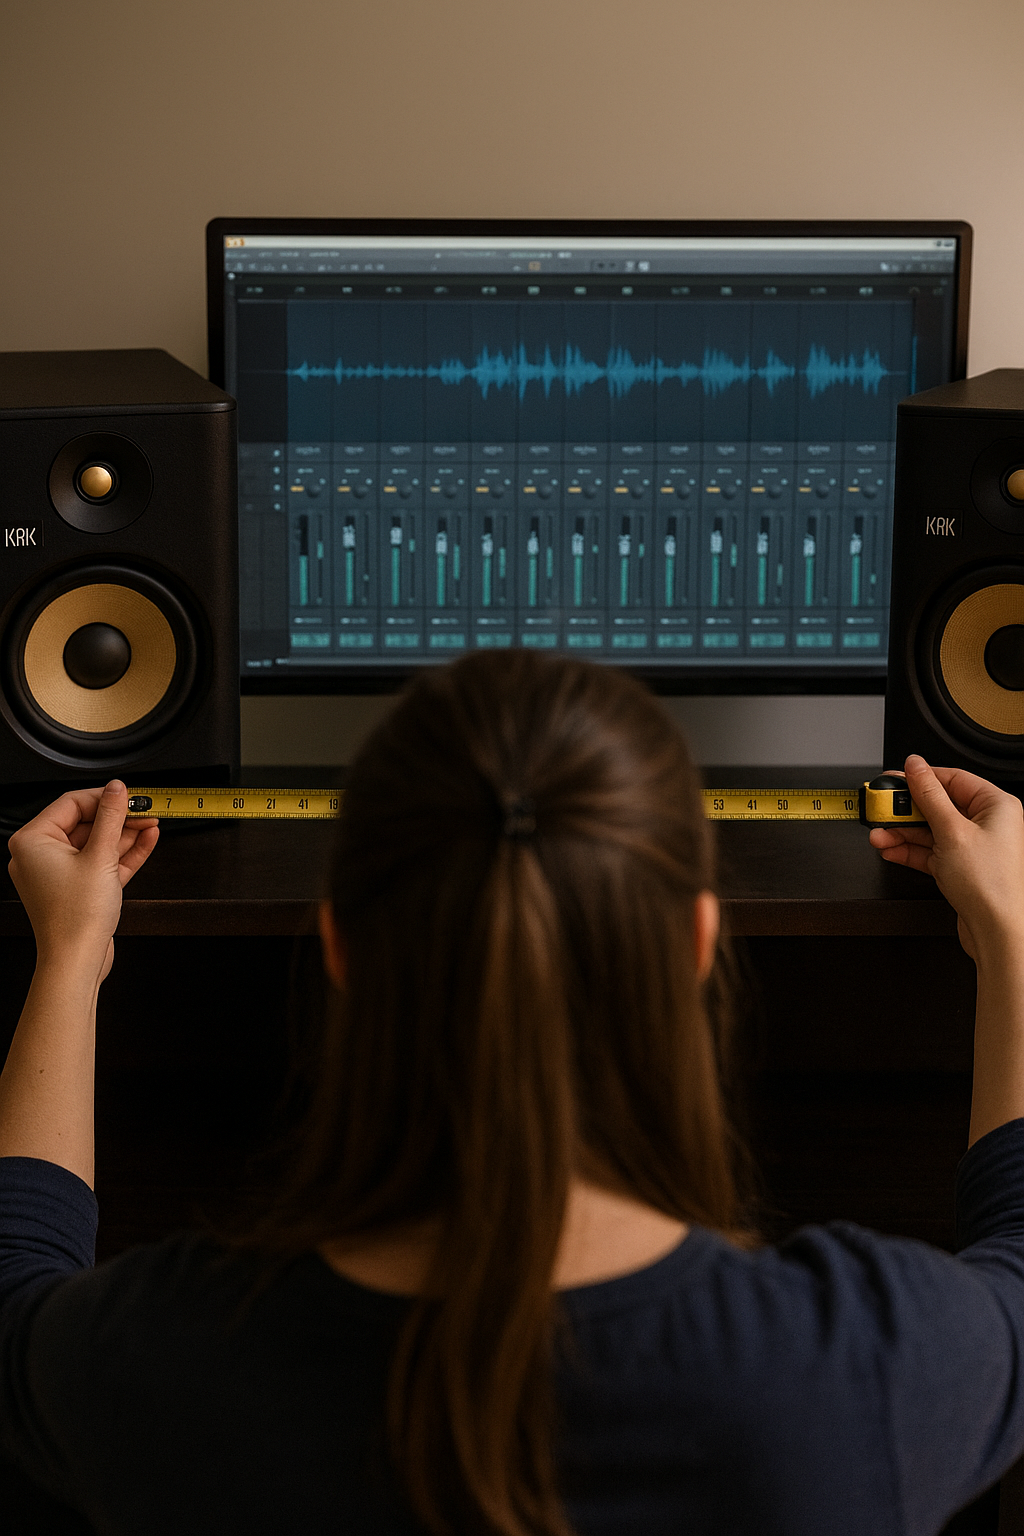
Start with the listening position. Your head and the two monitors should form an equilateral triangle, meaning all three sides are the same length. The tweeters should be at ear height and aimed directly at your listening position. This gives you a clear stereo image, which is essential for audio and video editing where balance and clarity matter more than club level volume.
Distance from walls matters more than most people expect. Placing monitors right up against a wall exaggerates bass and makes everything sound bigger than it really is. Pull them forward if you can, even 6 to 12 inches helps. Corners are the worst offenders because they amplify low frequencies and smear detail, which is deadly when you are trying to judge dialogue or music accurately.
Room reverb is the silent troublemaker in home studios. Hard surfaces like bare walls, desks, and windows reflect sound back at you milliseconds after it leaves the speaker. This creates comb filtering, where some frequencies are boosted and others vanish. You hear a flattering version of your audio that disappears the moment it leaves your room.
Basic room treatment fixes this fast. You do not need to turn your space into a foam cave, but a few well placed acoustic panels make a massive difference. Focus on first reflection points on the side walls and ceiling, and add some absorption behind your listening position. This tightens the sound, reduces reverb, and makes editing decisions far more reliable.
Desk placement also plays a role. Large flat desks reflect sound straight back at your ears, especially in the midrange where voices live. If possible, raise your monitors slightly on stands or isolation pads so they are not firing directly across the desk surface. This simple change can clean up dialogue clarity and reduce ear fatigue during long editing sessions.
Now a quick word on real world monitors. The KRK RP5G5 ROKIT 5 Generation 5 monitors are popular for a reason, offering a strong low end that benefits from careful placement away from walls. PreSonus Eris 3.5 Gen 2 Studio Monitors are compact and forgiving, making them well suited to smaller rooms when positioned thoughtfully. Edifier Bookshelf Speakers with Bluetooth are not traditional studio monitors, but with correct placement and some room control they can still serve well for video editing and general content work.
Finally, trust your ears but verify with movement. Play familiar reference material and slide your chair forward and back slightly. You will hear where bass tightens and imaging locks in. That sweet spot is where your monitors want to live. Once you find it, mark it, stick with it, and resist the urge to constantly rearrange.
Good monitor placement does not just make your studio sound better. It makes your decisions faster, your edits cleaner, and your work more consistent everywhere else. In a home studio, that is not a luxury. It is an essential.
Studio monitor placement is one of those topics that sounds boring until you realise it is the difference between mixes that travel well and mixes that only sound good at your desk. You can own great monitors and still fight strange bass, harsh highs, and reverb that was not in your recording. The good news is that fixing this costs far less than buying new gear and often just requires moving things a few inches.
Start with the listening position. Your head and the two monitors should form an equilateral triangle, meaning all three sides are the same length. The tweeters should be at ear height and aimed directly at your listening position. This gives you a clear stereo image, which is essential for audio and video editing where balance and clarity matter more than club level volume.
Distance from walls matters more than most people expect. Placing monitors right up against a wall exaggerates bass and makes everything sound bigger than it really is. Pull them forward if you can, even 6 to 12 inches helps. Corners are the worst offenders because they amplify low frequencies and smear detail, which is deadly when you are trying to judge dialogue or music accurately.
Room reverb is the silent troublemaker in home studios. Hard surfaces like bare walls, desks, and windows reflect sound back at you milliseconds after it leaves the speaker. This creates comb filtering, where some frequencies are boosted and others vanish. You hear a flattering version of your audio that disappears the moment it leaves your room.
Basic room treatment fixes this fast. You do not need to turn your space into a foam cave, but a few well placed acoustic panels make a massive difference. Focus on first reflection points on the side walls and ceiling, and add some absorption behind your listening position. This tightens the sound, reduces reverb, and makes editing decisions far more reliable.
Desk placement also plays a role. Large flat desks reflect sound straight back at your ears, especially in the midrange where voices live. If possible, raise your monitors slightly on stands or isolation pads so they are not firing directly across the desk surface. This simple change can clean up dialogue clarity and reduce ear fatigue during long editing sessions.
Now a quick word on real world monitors. The KRK RP5G5 ROKIT 5 Generation 5 monitors are popular for a reason, offering a strong low end that benefits from careful placement away from walls. PreSonus Eris 3.5 Gen 2 Studio Monitors are compact and forgiving, making them well suited to smaller rooms when positioned thoughtfully. Edifier Bookshelf Speakers with Bluetooth are not traditional studio monitors, but with correct placement and some room control they can still serve well for video editing and general content work.
Finally, trust your ears but verify with movement. Play familiar reference material and slide your chair forward and back slightly. You will hear where bass tightens and imaging locks in. That sweet spot is where your monitors want to live. Once you find it, mark it, stick with it, and resist the urge to constantly rearrange.
Good monitor placement does not just make your studio sound better. It makes your decisions faster, your edits cleaner, and your work more consistent everywhere else. In a home studio, that is not a luxury. It is an essential.
You may purchase items mentioned in this article here. Affiliate links earn me a commission at no extra cost to you. Thanks for supporting IanGardner.com